webShaper CSS Template System
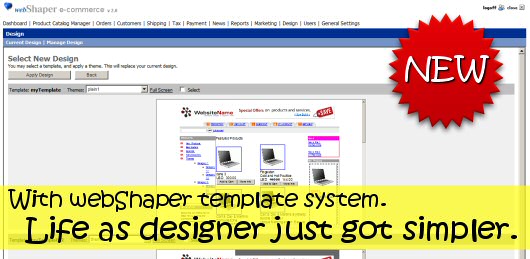
Imagine a CSS template system so flexible, it can practically accommodate to any design you have for your clients. Easily changeable and updatable, it will save you valuable amount of time to put up your design. Check out what a UK Web Designer has to think about it after "dogfood" it.
 The first massive benefit of webShaper e-commerce is the access to the source code of the templates, which allowed us to bespoke the pages and layout to an infinite degree. This along with the tag based components and page sections (header, footer, columns etc.) allowed us integrate and manage the rollout smoothly. Again, direct access to files such as .css and .js meant we could put our own personal touches in without compromising the product with hacked-in' modifications. The first massive benefit of webShaper e-commerce is the access to the source code of the templates, which allowed us to bespoke the pages and layout to an infinite degree. This along with the tag based components and page sections (header, footer, columns etc.) allowed us integrate and manage the rollout smoothly. Again, direct access to files such as .css and .js meant we could put our own personal touches in without compromising the product with hacked-in' modifications.
The freedom to do this within such a comprehensive package is rare but has meant we achieved everything the design and spec needed quickly.
- Stephen Elldred, Web Designer, UK |
Basically, the template system is divided into 3 major section:
1. Static Pages
2. Template Files
3. Theme Files
i. Static Pages.
Static pages are additional pages (as many as you want) that you can add to your site. Eg locationmap.html, contactus.html & services.html. However, links to these pages are not automatically linked from the web site. You can easily add these links to the template files.
ii. Template Files
Template files make up the framework for your site. It may consists of template.html only, or together with header.html, footer.html, leftbar.html, rightbar.html. This depends on whether these sections are separated out in template.html. If it's separated out, template.html will have the related tags to call those sections e.g. (<header>, <footer>, <leftbar>, <rightbar>).
iii. Theme Files
Theme files consist of Images, CSS, and Skin files that can be tweaked to further customize the design. The default CSS file has styles that are specific to certain IDs of the elements in the layout. And as for the Skin file, you may find it useful to change the buttons' images across the entire website. You may also add in additional images as you see fit.
Design Guide for the Template System
a) Create Template
b) Spice Up Your design with CSS and Skinning
a) Create Template
1. Download "template.html" and save as template.html (main template file)
2. Open the file and you will see element tags below:
| TAGS |
Description |
| <title></title> |
Prints out the Title. |
| <description/> |
Prints out the Meta Description. |
| <keywords/> |
Prints out the Meta Keywords. |
| <googleAnalytics></googleAnalytics> |
Prints out google analytics code. |
| <theme></theme> |
Prints out theme link to the CSS file. |
| <statCounter/> |
Prints out statCounter tracking code |
| Other sections, if used are called using these elements |
| <header> |
Prints out the file from header.html |
| <footer> |
Prints out the file from footer.html |
| <leftbar> |
Prints out the file from leftbar.html |
| <rightbar> |
Prints out the file from rightbar.html |
3. Next, prepare design (HTML) for <header/>, <leftbar/>, <rightbar/>, <footer/>.
You have 2 options:
3.1. In template.html, replace the tag <header/> with your design for the header OR
3.2. Leave the tag <header /> intact. Add the HTML to a newly created file and name it header.html. <header /> will display header.html
4. Repeat the step above for tags <leftbar/>, <rightbar/> & <footer/>.
Note: The template files should be XHTML compliant, which means HTML elements should be conforming to XML standard. While this is more work to be done (initially), it will result in serious productivity gain when it comes to maintenance of the web site.
For eg.
1) <br> must be <br/>
2) <b> must have closing tag </b>
3) <td nowrap> is not allowed. It must be <td nowrap=nowrap> |
You could use an online HTML tidy site, to clean up your HTML to conform to XHTML standard. Please check out the tools at http://infohound.net/tidy/
Tips: Are you using Dreamweaver? Here's how to turn your page into XHTML compliant
5. Upload the template files template.html (and header.html, leftbar.html, rightbar.html & footer.html if any) using webShaper Design Manager > Manage Design > Create New. You will be able to preview the layout of your design once the files are uploaded. The preview may fail if your design does not conform to XHTML standards.
b) Spice Up Your design with CSS and Skinning
1. The Theme section consists of:
i. Images Folder Folders to store uploaded images [related to your design].
ii. Default.css Central CSS file to control all style and presentation of the site.
iii. Skin.xml Easily edit your button images here.
2. Store all your pictures in "images" folder and upload them to webShaper.
3. Copy our default.css file. This file has predefined CSS classes and IDs. Edit this CSS file and you find this exciting. Save this file as default.css on your computer and upload to webShaper.
4. Edit skin.xml to customized your buttons such as the "Add to Cart" button. Upload skin.xml and you are done!
Want to find out more? Nothing beats giving the REAL THING a try. Just logon to the demo at http://www.neowave.com.my/DEMO. Any further enquiries please FEEL FREE to contact us and we shall reply you within 1 business day.
|

 Newsletter
